Showing posts with label DIY. Show all posts

Wednesday, July 3, 2013

Our Home, A Tour: The Living Room

This next room is the largest in our home, and is the reason we purchased the house! 
The Living Room

Because this room is so large, I thought I'd share the changes as they've happened section by section, or wall by wall. 

North-West Corner
Before move in

Soon after move-in, after we installed the home-theater. 

After we purchased a new couch, hung curtains, removed wallpaper, and painted the walls and trim. 

With the screen up, a bit less centered on the TV. :) 

North-East Corner
Before move in

Soon after move-in

After the purchase of new a new couch. The room stayed this way for a long time - we focused our efforts on other rooms and spaces for a few years, but finally this year, soon after the New Year, I spent a week ripping down wallpaper, painting trim and painting these two walls to match the south wall (which had been painted for a while). We couldn't believe how much we were pleased with the change! It was one of those projects that took a good amount of time (the kids had a TV marathon week while I worked) but didn't cost a lot and made a HUGE change. 

After hanging curtains, wall-paper removal, paint on walls and trim. The trim was an almond color in the living room and dining room I repainted it a crisp white. I'm a HUGE fan of white trim. 

South Wall (You may remember many of these photos from this post and this one)
Soon after move-in, ripping down the wall to install a french door. 

Exposed studs!

Door removed and hole cut for french door! 

French door installed

Dry wall put up

Seams taped and mudded.

Wall painted 

Wall, windows and door trimmed out, curtains hung! ALL DONE!

The curtains are drop cloths from Home Depot that I hemmed to the correct length and added clip rings to the top. They work great, were extremely economical, are a fantastic weight and are a nice, neutral, soft touch in the room. With all that brick, I was thrilled to bring in some texture that was not hard to the touch! :) 

We LOVE our living room, and spend the majority of our time in this room. Wether we are playing with the kids, on our computers, reading, visiting with friends or watching TV - it all happens in this room, we live in here. :) 

Saturday, June 29, 2013

Our Home, A Tour: The Master Bathroom

 Presenting: 
The Master Bathroom

Like I said when I gave you a tour of our Hall Bathroom, we learned a lot about home renovations during that project! And we were able to apply some of what we learned when working on our second bathroom. Like: 
  • Don't start a project until you have money/supplies to finish it.
  • Begin with a plan, not because you want to rip down a wall. 
  • Don't begin projects right after you find out you are expecting a baby... oh wait, we failed on that one. oops! ;)
Oh! And we drastically cut down our project time! Our Hall Bath took us 2 years, for many reasons, but this one took us about 2 weeks! Hurray for applying lessons learned!

Before: 

 I wish I would have taken more-updated before pictures of this room - the above picture was taken right after we moved in and sadly this bathroom deteriorated under our feet. I'll try to describe to you in words it's situation: The tile in the shower floor had not been installed properly so the majority of the grout worked it's way out over 2 years - leaving a shifty, sometimes poke-your-toes floor. The linoleum was peeling badly and discolored in a few places. The cabinet door didn't fit correctly, so I only had one attached - something I, surprisingly, got used to. It's funny how your list of priorities changes when you've lived in a house for awhile. :) (Can anyone relate?) 

So we started with ripping out the shower floor - the walls were in good shape, so we hoped to save them and just lay new tile down on the bottom. Brad spent a good afternoon breaking out the tile and scraping the shower pan to prep it for tile. We were able to find a tile we felt accented the walls well for the shower floor and then a pretty close match for the floor of the bathroom. I can't believe how simply changing the flooring dressed up this bathroom! We also painted both the upper walls and freshened up the bead-board which covers the bottom 4ish feet of the walls. 

After:
 Brad also used his carpentry skills to cut down the cabinet door and even added some trim to them so that the doors looked more "finished" they are so amazing. I'm a proud wife. It's given us confidence about possibly redoing a kitchen someday.... eek.

Before/After Side by Side: 
Hurray! Two bathrooms, spruced up by the Kidders - it feels so good to have them done!! 

We are done with bathrooms and bedrooms, let's do living spaces next! Front Room, here we come!

Sunday, June 23, 2013

Our Home, A Tour: Hall Bathroom

Hi friends, I'm starting a new - few week long - series here on the blog to document the progress and updates we've made on our home here in Pampa both for memory's sake and so you can see what we've done! :)

I even made a series picture/header! Fancy schmancy.
Today, I'd like to take you on a tour of our:
Hall Bathroom

I know what you're probably thinking, why in the world are you starting with a bathroom Sarah? I've chosen to start here for a few reasons. 
  1. This is the room that took us the longest from start of project to finish of project (close to 2 years.... eek!). 
  2. It's a pretty drastic before/after and, no lie, I want to make your jaw drop right off the bat. 
  3. We learned SO much about home renovations and all future projects will be better because of this room. 
  4. I'm really proud of this room. 
Let's start with the BEFORE: 
 Yep, that's a Pepto-Bismol pink tub accented nicely by gold and pink flecked tile and mauve walls. The room was crowned with floral wallpaper. Not in horrible shape, but definitely not our taste.

 The other side of the room. There was, when we put in an offer on the house, a pink toilet to match the tub, but it didn't pass the house inspection so the previous owner's replaced it with a white one for us. 

PROGRESS (taken over the course of 2 years):
We did the majority of the work ourselves, but did have some help along the way, we had a plumber install a line up for a shower head (the tub only had a bottom spigot previously), our friend Mike helped move the old tub out and new tub in and our friend Josh helped with all the tiling - both the shower surround and flooring. Thanks guys so much for your help!!! Brad did the of the brain work - and even found our MARBLE tile at a major discount.
AFTER:
 Shower! NO MORE PINK! Hurray! 

 The other side of the bathroom. After a new tub, drywall, shower surround, flooring, vanity, mirror, lighting, baseboards, crown and paint we were done! Phew!

And because I love a good before/after:

 Amazing right? 

We love our new bathroom! It was a lot of work, but we are so pleased with the results. 

Check back tomorrow for a tour of Michael's room (never seen before on the blog!). :) 

Thursday, May 9, 2013

DIY Haircuts

Both of the kids needed hair cuts this spring and I didn't really want to spend $24 (for both kids) to get them done at a salon. So I did it myself! 

First up was Lucy: 

Before - this was taken Valentine's day. When her hair was down it was hitting her mid-back! It grows so fast! 

Before - I'm pretty sure that my daughter could have curly hair - it's pretty wavy back there! 

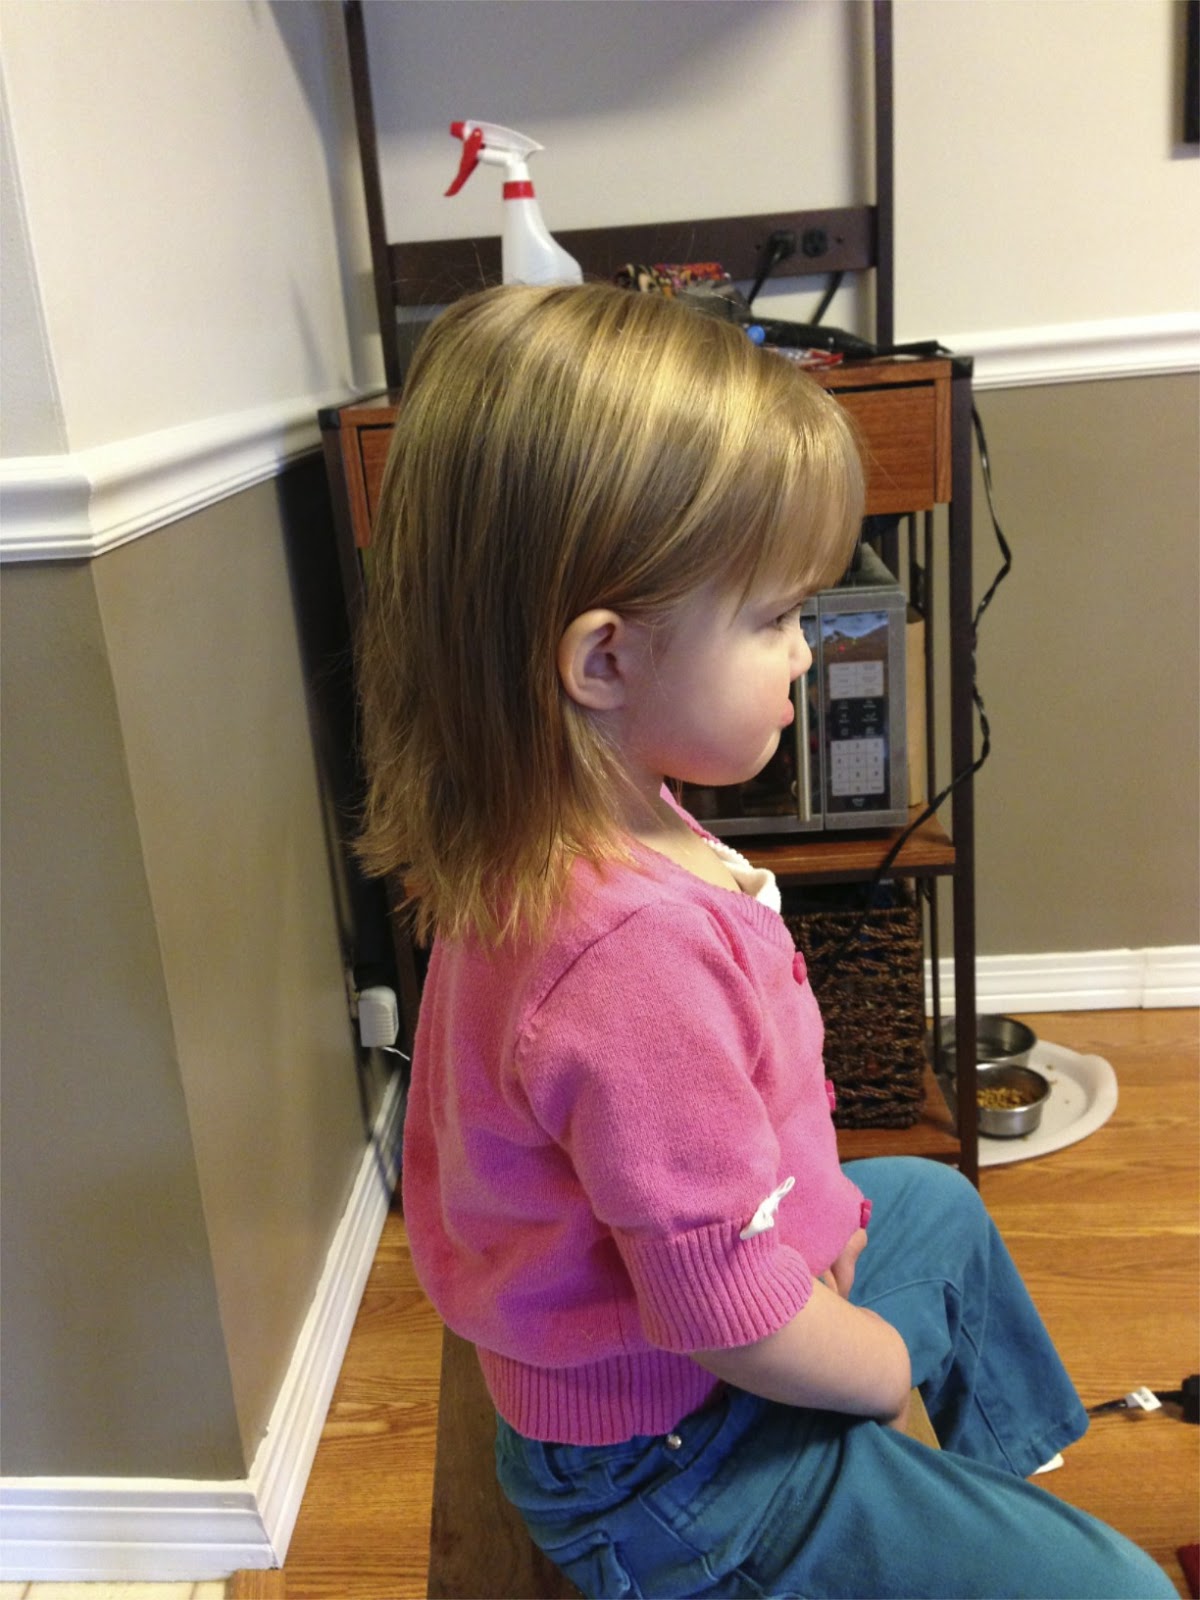
After - Just below her shoulders, a little shorter than I anticipated but it turned out well! (I cut her hair wet and as it dried it shrunk up - very normal... I just forgot about that when I was cutting it)

After - a side view.

A trip to Mommy's Beauty Parlor wouldn't be complete without a fresh manicure. :) 

All done! 

Next up was Michael boy! He hadn't had a haircut yet - so it was pretty crazy. 

(Cell phone picture) Before - It was long in the back and would even form 3 or 4 ringlets at times!

(Cell Phone Picture) Before - it was long and uneven in the front. 

Before - it was crazy! :) 

During - You can see my trick here, utilize technology to encourage kids to look in one direction (it was working really well - but Daddy coming over to take a picture distracted Michael for a minute). :) I had read a few tutorials online and watched 1/2 of a video on YouTube (I didn't watch the entire thing because the lady's voice was a bit annoying). It was nice to know his hair would grow back even if I made a mistake. :) 

A friend asked me on FB to pass on my notes about what I learned when cutting his hair - so I thought I'd post them here too (just in case I need to reference them next time he needs a trim). :) 

"Well, as far as mistakes go: I cut off more from his neck than I wanted to - I accidentally cut one side shorter and then to correct the accident had to chop off the other side too.... I think his bangs will improve as his hair gets thicker. And when to side burns come in? I'm ready for him to have them! He looks like Frier Tuck to me at times. Haha!

As for the method: I wet his hair, combed all hair on the crown forward and the rest down (toward his shoulders). Next time I will trim his neck to the length I want before trimming the sides. Using the comb to "grab" the hair, I took vertical chunks about an inch thick from the sides and back and cut the hair one finger away from his head. (I "Pinched" the hair with my pointer and middle fingers and cut by my knuckles). For his bangs I knew I wanted to cut an inch off, so standing behind him I combed his bangs straight out "Pinched" with my fingers and cut about an inch off. I checked the length to make sure it was ok, I then lifted the hair on the crown vertically straight up and trimmed the ends even with the bangs I had just cut."

After - ALL DONE! No more ringlets - but he looks like a little man now! :) 

After - I want to improve on the sides next time, and i cut it a little too short in the back - but for my first boy-haircut I was pleased. :)

Michael was pleased to not be strapped into his seat anymore! :) 

So after I cut the kids hair I had a thought, "Why don't I trust myself to cut my bangs? I might as well try it!" It costs about $10 for me to get a bang trim and I have to get them ever 4-6 wks if I want my bangs to be "workable." That quickly adds up! In the hopes of keeping my $10 I tried it... 

And it worked too! :) I was very pleased with how it went. I cut it dry (I didn't want the bangs shrinking up like Lucy's hair did) and went slowly. Brushing a lot in between cuts and playing with how the bangs laid. I did it during a time when Brad was home so that he could watch the kids and i didn't have them underfoot (possibly the best idea - I don't think I could have done it if they were in the same room with me). :)

Do you DIY haircuts at your house? I've saved $34 so far! :)